Turn on automatic forwarding in Outlook on the web or Outlook Desktop
You can automatically forward or redirect your email messages by setting up Inbox rules in Outlook on the web. This is useful if you want to read and respond to messages from another email account or when you want someone else to receive and respond to your email in your absence. Forwarding email in Outlook can be done in two places - Outlook Web Access, or in the Outlook Desktop app using an inbox rule.
Outlook Web Access
- Click here to log in to Outlook Web Access
- At the top of the page, select Settings

- Select View all Outlook settings.
- Select Mail > Forwarding
- Select Enable forwarding, enter the forwarding email address, and select Save.

Notes:
If you want a copy of the original message to remain in your mailbox, select Keep a copy of forwarded messages.
Outlook Desktop
- Open Outlook.
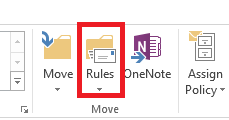
- Click the Home tab and then select Rules (located toward the center of ribbon).
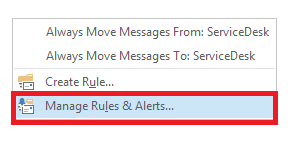
- Select Manage Rules & Alerts from the drop down.
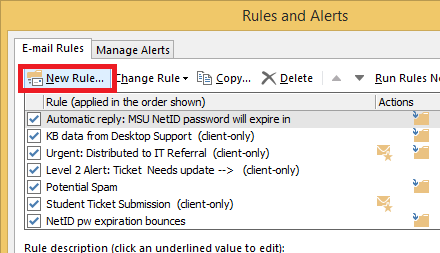
- Select New Rule.
- Select Apply rule on message I receive located near bottom of list, then click Next.
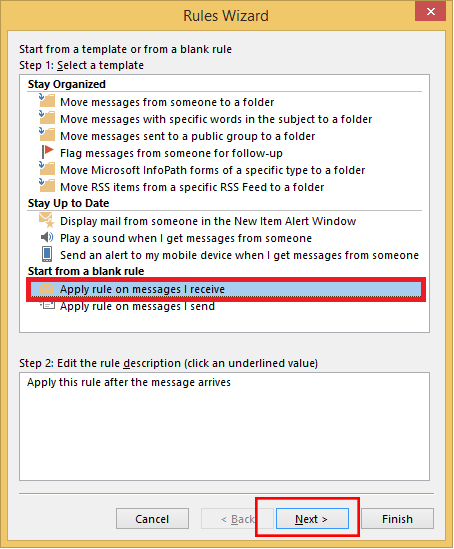
- Click Next (don't select anything).
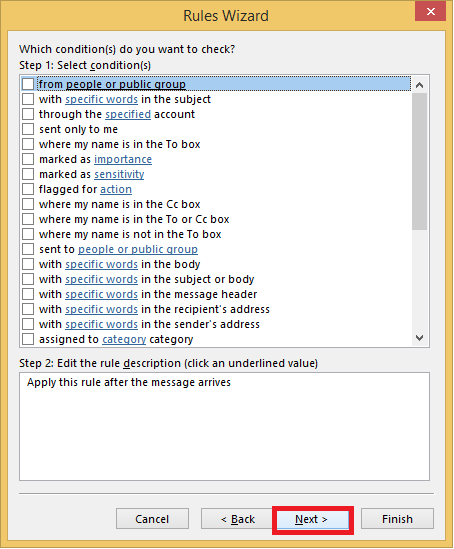
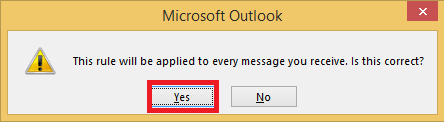
- Click Yes when asked This rule will be applied to every message you receive. Is this correct?.
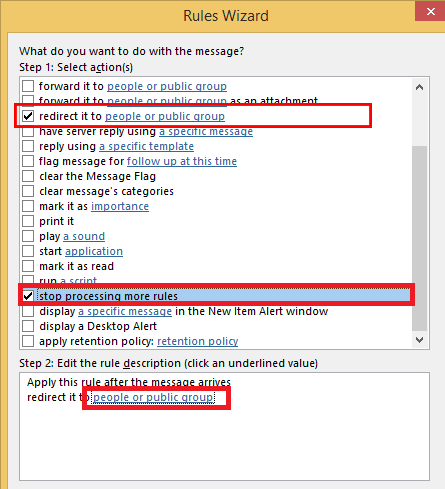
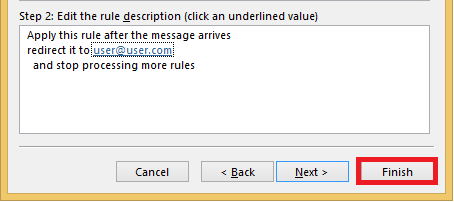
- On the next list select the following actions (see image below):
- stop processing more rules
- Click the underlined phrase: people or public group in the bottom part of window.
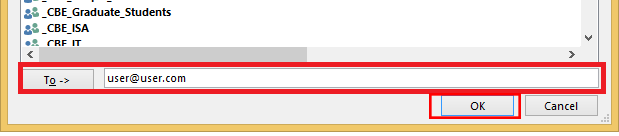
- Type the email address to forward mail to in the To field, then click OK.
- Select Finish.
The rule should be listed, with the box checked, in the Rules and Alerts window. Click OK and you're done.
Related Articles
Create and Add an Email Signature in Outlook
In Outlook, you can create one or more personalized signatures for your email messages. Your signature can include text, links, pictures, and images (such as your handwritten signature or a logo). New Outlook Note: If the steps under this New Outlook ...Manage email messages by using rules in Outlook
Applies To Outlook for Microsoft 365 Outlook 2024 Outlook 2021 Outlook 2019 Outlook 2016 Outlook on the web Outlook.com Microsoft Office New Outlook for Windows Outlook Web App Use rules to automatically perform specific actions on email that arrives ...Full Mailbox Storage Solutions - Outlook
Manual Mailbox Cleanup 1. Deleted Items Folder Old or unnecessary deleted emails can accumulate quickly. Outlook Desktop Go to the "Deleted Items" folder in the left pane. Right-click on the folder and choose "Empty Folder". Outlook Web Click on ...Disable automatic downloading of remote content in Outlook
Intro Disabling automatic downloading of remote content in Outlook may speed up the loading of emails, and increase security by not loading remote content such as photos, icons, or Loop components like forms, when reading an email. This is the ...Ironscales Report Phishing - FAQ
Dear Team Members: We have recently implemented an advanced anti-phishing platform that will help protect your mailboxes from real time phishing / malicious email attacks. Over the next week, look for the new IronScales Report Phishing icon. This is ...