How to enable or disable Indexing in Windows 10
How to enable or disable Indexing in Windows 10
First of all, let me say that this post doesn’t refer to the Windows Experience Index, but rather to the indexing feature in Windows 10, which is related to file search. We briefly go through its features and explain how to enable and disable it.
For those who don’t know what exactly indexing does in Windows 10, here’s the short explanation – by turning on certain components of the index service you can speed up file searches or you can choose to disable it, in case you suspect it might be the culprit for your computer’s slow performance.
To access the “indexing options” service in Windows 10, open the search bar or press the Windows key and W together. Just type “indexing” there and you will find it.
Indexing files are rather important, and in this article, we’re going to cover the following topics:
- What is file indexing – Indexing is a built-in feature of Windows that allows you to quickly and easily find certain files or applications.
- Indexing options Windows 10 – Indexing is a customizable feature, and in this article, we’re going to show you how to change basic indexing options.
- Indexing windows 10 SSD – File Indexing fully supports SSDs, and in this article, we’re going to show you how to index your entire drive.
- Windows indexing external hard drive, removable drives – Indexing fully supports external hard drives and removable drives so you can easily index files on any removable storage device.
- Windows indexing exclude – As we mentioned, Windows Indexing supports customization, and you can easily exclude any directory from being indexed. This is rather useful if you have a directory or a drive that you rarely access.
- Windows indexing rebuild, repair, reset – Sometimes your index can get corrupted and that can negatively impact your performance. However, you can easily repair your index with just a few clicks.
- Windows indexing turns off, on – Some users want to completely disable Windows Indexing. There are few ways to do that, and we’re going to cover them all in this article.
- Windows indexing file contents – Indexing also allows you to index file contents. This is rather useful if you’re working with text files and you need to find a file that has a specific word in it.
How can I enable or disable indexing on Windows 10?
- Disable Windows Search service
- Turn off Indexing using Command Prompt
- Change Indexing options
- Turn off Indexing for a specific partition
- Rebuild Search Index
Solution 1 – Disable Windows Search service
In most cases, this service is turned on automatically, but if you want to make sure that everything is in perfect order, here’s what you need to do to enable the indexing service in Windows 10:
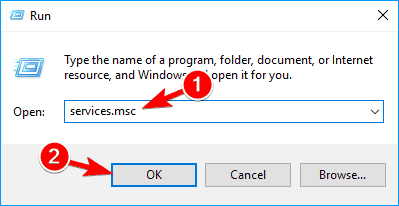
- Open the Run window – press Windows key + R or just type Run in the Search bar.
- Type services.msc and press Enter or click OK.
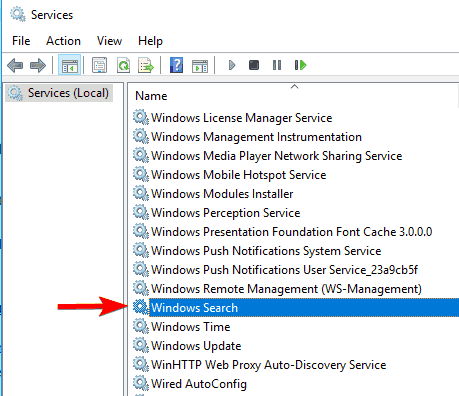
- Find the Windows Search service and double-click on it. It looks like in the right screenshot.
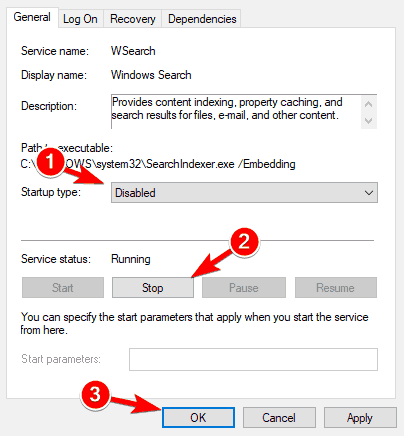
- Find Startup type: and select Disable from the pull-down menu. Now click the Stop button to stop the service. Click Apply and OK buttons to save changes.
- Now restart your PC.
After your PC restarts, Windows Indexing feature should be completely disabled on your PC. To turn it back on, simply undo the changes you made in this solution.
As you can see, ‘Windows Search’ is responsible for content indexing, property caching, search results for files, emails, and other content.
So, by enabling or disabling it, you will consequently turn on or turn off the above-mentioned features. You can easily choose to stop or restart the service, in case you have problems with it.
If you’re dealing with Windows Search Indexer’s high CPU utilization, you can fix it by following this guide.
Windows Search Protocol Host has stopped working on Windows 10? Count on us to solve the problem.
Solution 2 – Turn off Indexing using Command Prompt
Disabling Indexing is rather simple from the Services window, but if you’re an advanced user, you can disable it from Command Prompt. To do that, just follow these steps:
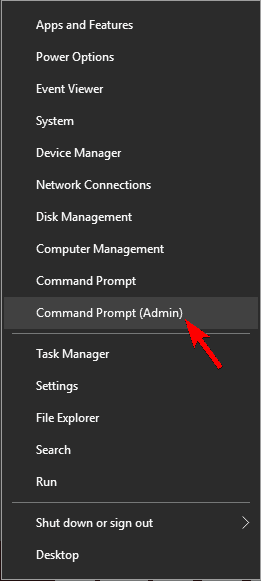
- Open Win + X menu by pressing the Windows Key + X shortcut. Alternatively, you can open this menu by right-clicking the Start button. Select Command Prompt (Admin) or PowerShell (Admin) from the menu.
- When Command Prompt opens, you need to enter sc stop “wsearch” && sc config “wsearch” start=disabled and press Enter to run it.
After doing that, you’ll stop Windows Search service instantly and the Indexing feature should be disabled. As you can see, this is a fast and simple way to disable Indexing, so if you’re an advanced user and you want to disable this feature quickly, be sure to try this method.


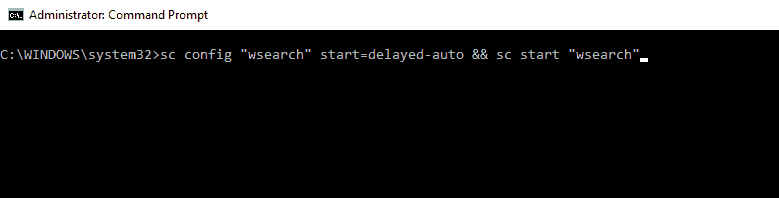
To enable Indexing, you just have to use sc config “wsearch” start=delayed-auto && sc start “wsearch” command.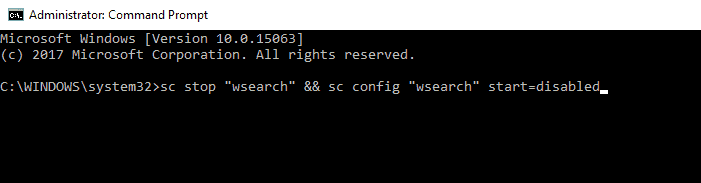
3. Change Indexing options
If you want to change your indexing options, you can choose which locations you want to index. By disabling certain locations from indexing, you might improve your performance. To change this setting, do the following:
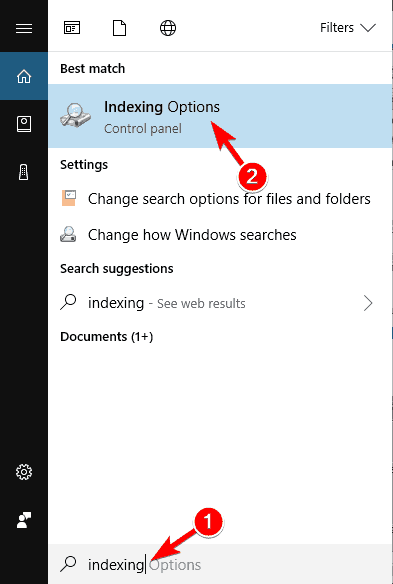
- Press Windows Key + S and enter indexing. Select Indexing Options from the menu. If this option isn’t available from the Search bar, you’ll need to access it from Control Panel.
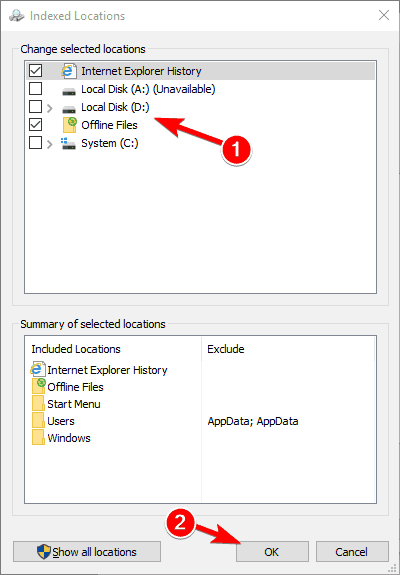
- Now you’ll see the list of indexed locations. Click on Modify button.
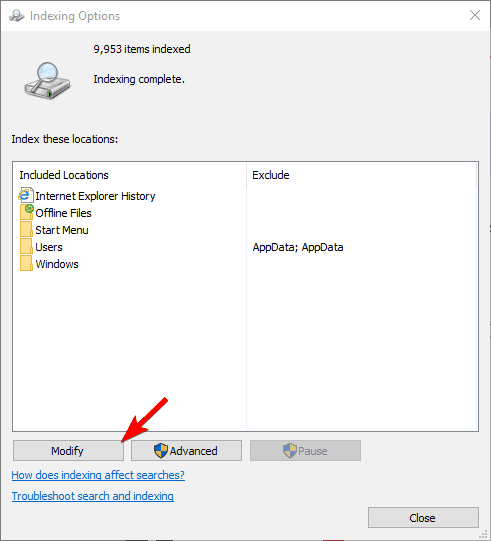
- Uncheck the locations that you don’t want to index and click on OK to save changes. If needed, you can also check a new location from the file tree to add it to your index.
By doing this you can optimize your PC and improve your performance by disabling indexing for the directories that you rarely use.
You can’t open Control Panel? Take a look at this step-by-step guide to find a solution.
4. Turn off Indexing for a specific partition
If you want to improve your performance, you can disable indexing for an entire partition or hard drive. To disable indexing for a partition, you need to do the following:
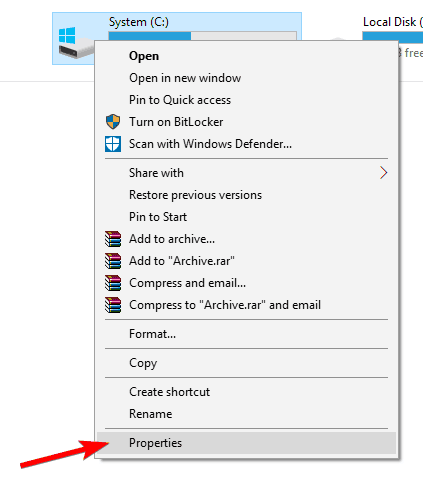
- Open This PC and locate your hard drive. Right-click the desired drive and choose Properties from the menu.
- When the Properties window opens, navigate to General tab. Now uncheck Allow files on this drive to have context indexed. Click on Apply and OK.
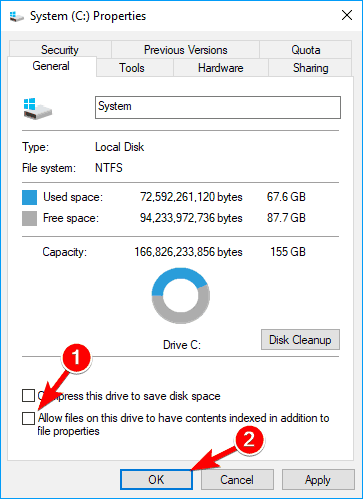
- After doing that, you’ll get a confirmation dialog asking you to change these settings only for the root directory or for all subdirectories on the drive. Choose the desired option and click on OK.
After doing that, your partition and files on it will be indexed and you’ll be able to search through them.
5. Rebuild Search Index
Sometimes issues with indexing can occur, and your search might become slow or unable to find the desired files. If this happens, your Search Index is most likely corrupted, but you can easily fix that.
If your Search Index isn’t working properly, you can fix it by following these steps:
- Open Indexing Options. You can do that quickly by typing indexing options in the Search bar and choosing Indexing Options from the list of results.
- When Indexing Options window opens, click on Advanced.
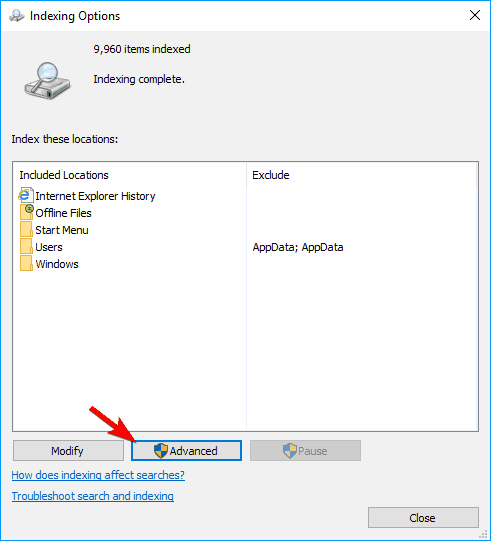
- Now click on the Rebuild button.
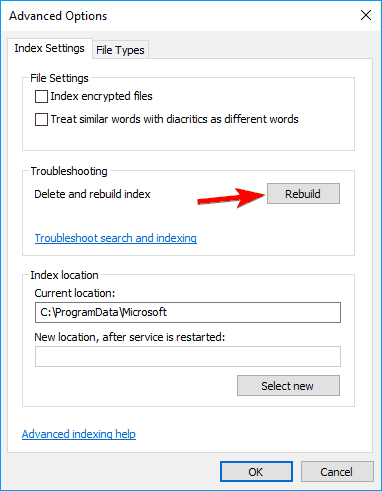
After doing that, you just need to wait for a couple of moments while Windows rebuilds your Search Index.
Most users don’t know what to do when the Windows search box goes missing. Read this article to learn how you can get it back in just a couple of steps.
Windows Indexing is a useful feature, and we hope that this article helped you understand how to configure or disable Indexing on Windows 10.
If you have any other questions, feel free to leave them in the comments section below.
READ ALSO:
- Fix: Windows search suddenly stops working
- Fix: Cortana Search Box Missing on Windows 10
- Fix: SearchUI.exe Fails to Load in Windows 10
Related Articles
Search indexing in Windows 10: FAQ
https://support.microsoft.com/en-us/windows/search-indexing-in-windows-10-faq-da061c83-af6b-095c-0f7a-4dfecda4d15a Search indexing in Windows 10: FAQ Windows 10 Indexing the contents of your PC helps you get faster results when you're searching it ...How to Rearrange Windows with Keyboard Shortcuts on Windows 10
Source: https://www.howtogeek.com/661249/how-to-rearrange-windows-with-keyboard-shortcuts-on-windows-10/#:~:text=First%2C%20press%20Alt%2BTab%20to,%2C%E2%80%9D%20and%20then%20press%20enter. Snap Windows to Halves or Quarters If you’re juggling ...Microphone is not working on any application (Windows 10)
Microphone is not working on any application. Mic registers input properly on the meter in Sound Settings and Sound Control Panel. No mic input on web chat, discord, sound recorder, etc. 1. Disable all access to problem mic input device in ...Set your Default Printer in Windows 10
In Windows, you can change your Default Printer in two locations: Windows Settings 1. Click Start: 2. Click Settings: 3. Click Devices: 4. Click Printers & Scanners 5. Choose the printer you want to be your default by clicking it in the list, then ...How to Find Your IP Address on Windows, Mac, iPhone, & Android
IP Addresses - Local & Public Related Links How to find my MAC address Overview What’s my public IP address? Assigned by your Internet Service Provider (ISP) and your gateway or modem. It’s how they determine which customer is requesting which ...