How to Adjust Outlook Mark Items as Read Timer
By default, Outlook is set to mark a message as read immediately after switching to the next one. Microsoft knows that everyone likes to manage their inbox differently, so it included a nice feature that allows you to set how long you need to sit on an email before it’s marked as read. Whatever your situation, you can adjust the read timer to whatever works for your inbox by following the simple steps below in Outlook 2016 or above.
Adjust Outlook Mark as Read Timer
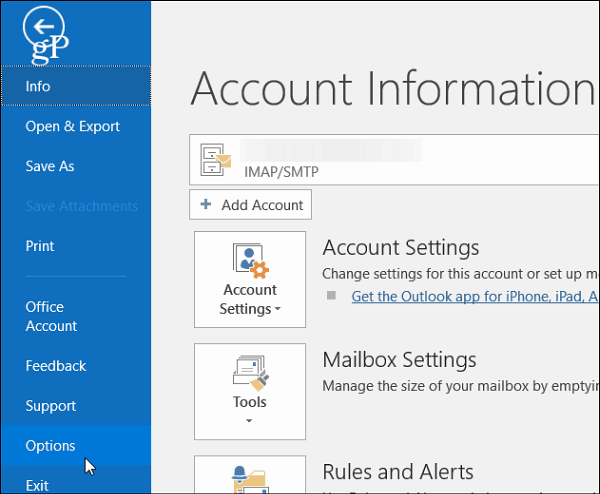
Click the File tab on the ribbon and then select Options.
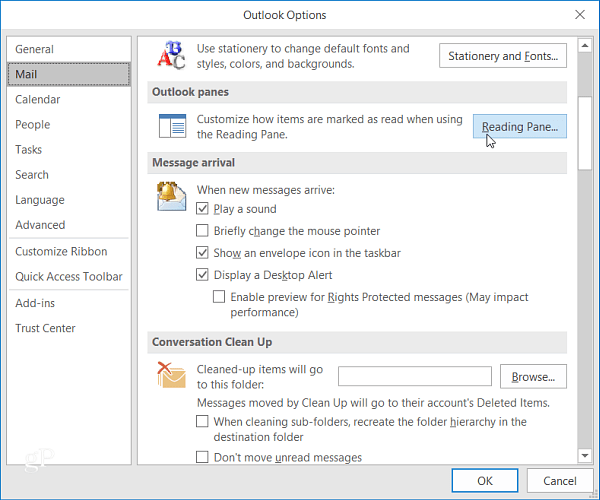
Next, in the Outlook Options window, select Mail in the right pane, scroll down to the Outlook panes section and click the Reading Pane button.
There you will find that the default selection is set to Mark item as read when selection changes. To set your own custom time, check the box next to Mark items as read when viewed in the Reading Pane. Then enter the number of seconds you want Outlook to wait before marking the item as read. Then click OK and OK again to close out of the Outlook Options window.

When you read an email, Outlook will wait for the amount of time you entered before marking it as read.
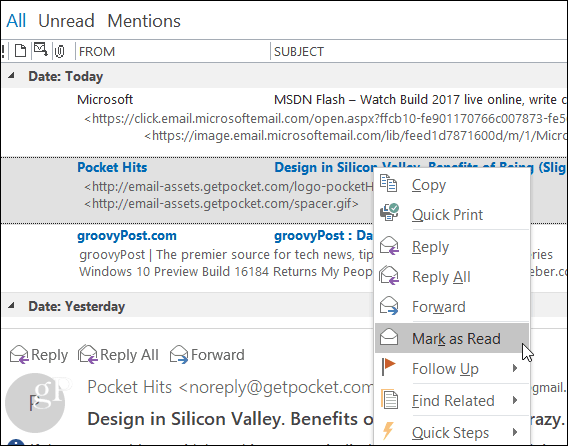
If there are messages that you would prefer to be marked as read more quickly, you can manually select them. Just right-click on the message and select Mark as Read from the context menu.
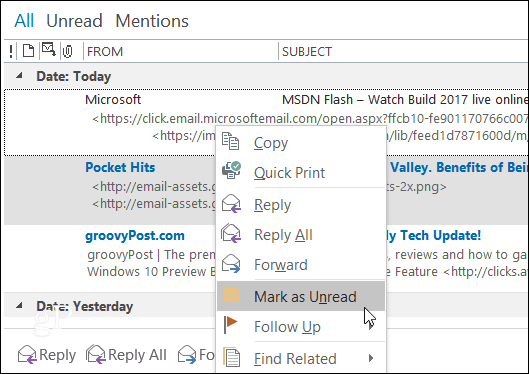
Note that you can also set messages that are already marked as read to unread from the context menu. Also, you can select multiple messages at once by holding Shift or Ctrl and click the ones you want to mark as read or unread.
Related Articles
Disable automatic downloading of remote content in Outlook
Intro Disabling automatic downloading of remote content in Outlook may speed up the loading of emails, and increase security by not loading remote content such as photos, icons, or Loop components like forms, when reading an email. This is the ...Full Mailbox Storage Solutions - Outlook
Manual Mailbox Cleanup 1. Deleted Items Folder Old or unnecessary deleted emails can accumulate quickly. Outlook Desktop Go to the "Deleted Items" folder in the left pane. Right-click on the folder and choose "Empty Folder". Outlook Web Click on ...Turn on automatic forwarding in Outlook on the web or Outlook Desktop
You can automatically forward or redirect your email messages by setting up Inbox rules in Outlook on the web. This is useful if you want to read and respond to messages from another email account or when you want someone else to receive and respond ...Manage email messages by using rules in Outlook
Applies To Outlook for Microsoft 365 Outlook 2024 Outlook 2021 Outlook 2019 Outlook 2016 Outlook on the web Outlook.com Microsoft Office New Outlook for Windows Outlook Web App Use rules to automatically perform specific actions on email that arrives ...Always Show The Bcc Field In Outlook
Always Show The Bcc Field In Outlook It is quite easy to always show the Bcc field in the new, replying, and forwarding email message windows in Outlook. 1. In the Mail view, please click Home > New Email to create a new email. 2. In the opening ...