Get started with Power Automate
https://docs.microsoft.com/en-us/power-automate/getting-started#create-your-first-flow
- Automate business processes
- Send automatic reminders for past due tasks
- Move business data between systems on a schedule
- Connect to almost 300 data sources or any publicly available API
- You can even automate tasks on your local computer like computing data in Excel.
Just think about time saved once you automate repetitive manual tasks simply by recording mouse clicks, keystrokes and copy paste steps from your desktop! Power Automate is all about automation.
Who is Power Automate for?
What skills do you need to have? Anyone from a basic business user to an IT professional can create automated processes using Power Automate's no-code/low-code platform.
What industries can benefit from Power Automate? Check out how some companies implemented Microsoft Power Platform solutions using Power Automate in:
Find examples from your industry
The first step in creating an automation is to sign up, or, if you already have an account with Power Automate, sign in.
What are the different types of flows?
Visit the flow types article to learn more about the different types of flows that you can create to automate your tasks.
Check out the start page
On the start page for Power Automate, you can explore a diverse set of templates and learn about the key features for Power Automate. You can get a quick sense of what's possible and how Power Automate could help your business and your life.
Each template is designed for a specific purpose. For example, there are templates for sending you a text message when your boss emails you, adding Twitter leads to Dynamics 365, or backing up your files. These templates are just the tip of the iceberg. They're intended to inspire you to create customized flows for the exact processes you need.
Create your first flow
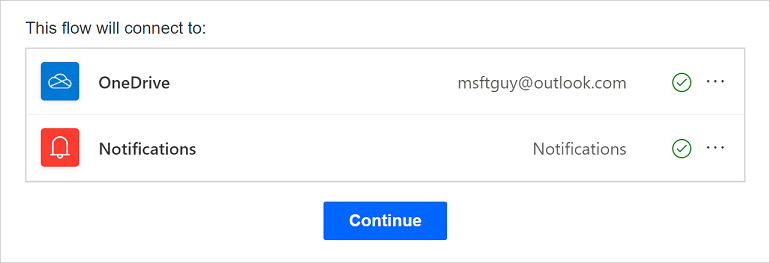
Select a template that's useful for you. A simple template is Notify and Email when a new file is uploaded to OneDrive.

Select Continue.
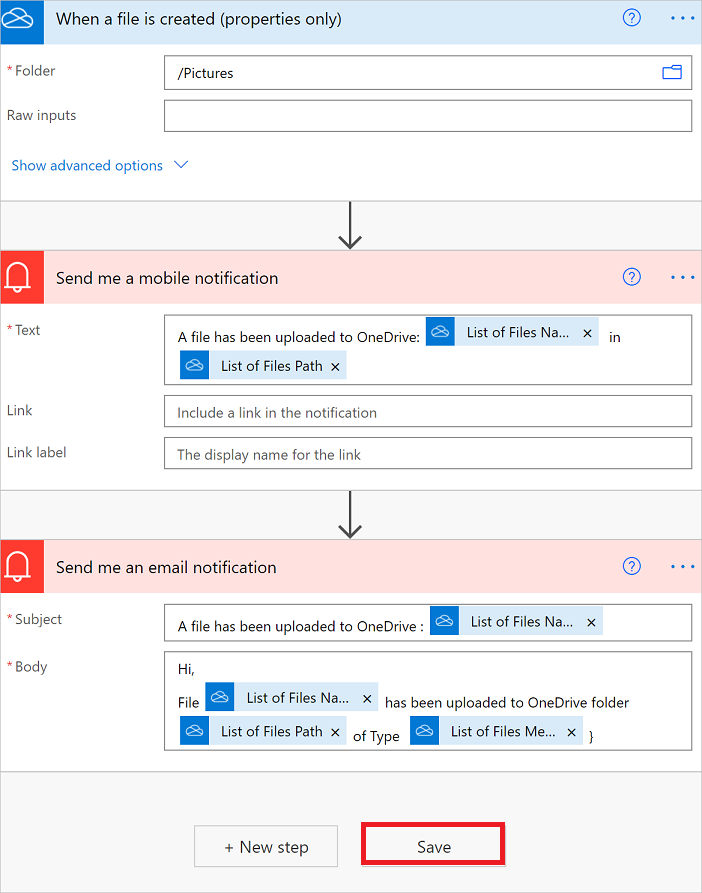
Select the OneDrive folder that you want to monitor.

Select Save.
Note
You can explore the conditions that trigger the flow and the action that results from that event. Play around with the settings to make the flow your own. You can even add or delete actions.
Tip
Follow this tutorial to learn more about creating flows from templates.
Get creative
Now that you've created your first flow from a template, use any of the more than 380 data sources that Power Automate supports to create your own flows from scratch.
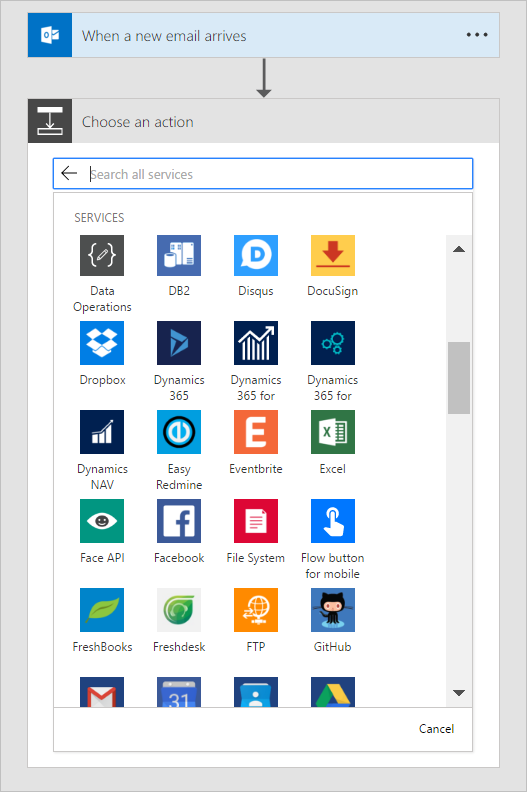
When you create a cloud flow from scratch, you control the entire workflow. Here are a few ideas to get your started:
- Flows with many steps.
- Run tasks on a schedule.
- Create an approval flow.
- Watch a cloud flow in action.
- Publish a template.
- Create flows from a Microsoft Teams template.
Peek at the code
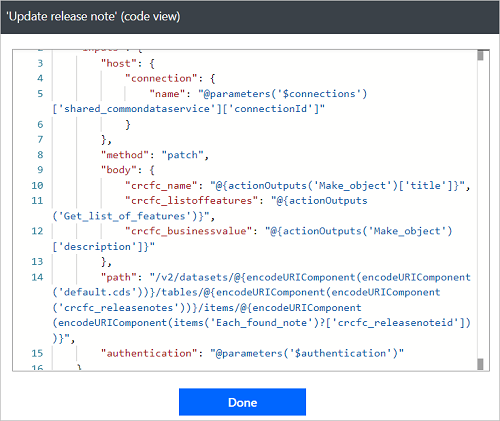
You don't need to be a developer to create flows; however, Power Automate does provide a Peek code feature that allows anyone to take a closer look at the code that's generated for all actions and triggers in a cloud flow. Peeking at the code could give you a clearer understanding of the data that's being used by triggers and actions. Follow these steps to peek at the code that's generated for your flows from within the Power Automate designer:
Select the ... menu item at the top right corner of any action or trigger.
Select Peek code.

Notice the full JSON representation of the actions and triggers. This includes all inputs, such as the text you enter directly, and expressions used. You can select expressions here and then paste them into the Dynamic Content expression editor. This can also give you a way to verify the data you expect is present in the flow.
Find your flows easily
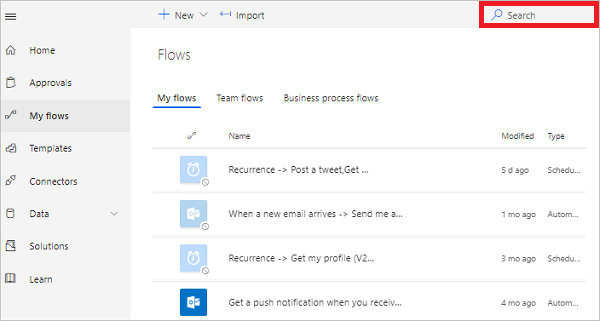
When your creative juices start flowing, you might create many flows. Don't worry, finding your flows is easy - just use the search box on the My flows, Team flows, Connections, or Solutions screen to display only flows that match the search terms you enter.
Note
The search filter only finds flows that have been loaded into the page. If you don't find your flow, try selecting Load more at the bottom of the page.
Get notifications when something's wrong
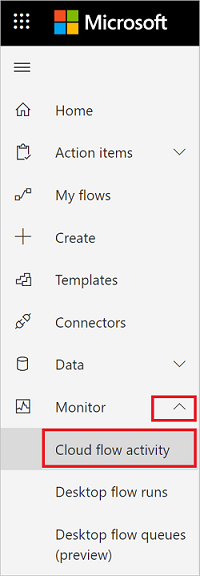
Visit the cloud flow activity page to see the list of cloud flows that recently ran, sent notifications, or have failed.
Sign into Power Automate.
Select Monitor on the left side of the screen.
Select Cloud flow activity.
Use the mobile app
Download the Power Automate mobile app for Android, iOS, or Windows Phone. With this app, you can monitor flow activity, manage your flows and create flows from templates.
Get help planning your Power Automate projects
If you're ready to start your Power Automate project, visit the guidance and planning article to get up and running quickly.
Related Articles
Keeper Family Plan
Keeper Family Plan Source: https://docs.keeper.io/user-guides/keeper-family-plan Keeper Family Plan This guide provides an overview of Keeper's Family Plan, including how to sign up, invite family members and accept account invitations. Overview & ...Free up drive space in Windows
Moved to HaloPSA 2/12/26 - https://psa.allyadvantage.com/article?id=34 Reference Microsoft Article: https://support.microsoft.com/en-us/windows/free-up-drive-space-in-windows-85529ccb-c365-490d-b548-831022bc9b32 These options are listed in order we'd ...Bridge Mode and Passthrough - Why are they used and what are the differences?
Bridge Mode and Passthrough - Why are they used and what are the differences? Misuse of terms Before we get started, it's important to note that the misuse of these terms is common with Comcast and Spectrum. Comcast and Spectrum often refer to ...How to use PING command
How to use PING command in Command Prompt Open the Command Prompt The easiest way to do this is to hit the Windows key on the keyboard and type "cmd" then hit enter Note that you could run this as administrator for advanced options but it is not ...Update WL-UG39D1 REV. A firmware
Update WL-UG39D1 REV. A firmware Ensure the dock is UNPLUGGED Copy firmware and tool from \Ally\TeamSite - Documents\Vendors\Carbon Systems\Firmware Updates\ Transfer to client computer where the dock will be installed Extract all files to a new ...